Deprecated: Optional parameter $blank declared before required parameter $slider is implicitly treated as a required parameter in /home3/notsoety/public_html/wp-content/plugins/revslider-3/admin/includes/plugin-update.class.php on line 2767

Deprecated: Optional parameter $item_count declared before required parameter $access_token is implicitly treated as a required parameter in /home3/notsoety/public_html/wp-content/plugins/revslider-3/includes/external-sources.class.php on line 68

Deprecated: Optional parameter $item_count declared before required parameter $access_token is implicitly treated as a required parameter in /home3/notsoety/public_html/wp-content/plugins/revslider-3/includes/external-sources.class.php on line 85

Deprecated: Optional parameter $item_count declared before required parameter $current_photoset is implicitly treated as a required parameter in /home3/notsoety/public_html/wp-content/plugins/revslider-3/includes/external-sources.class.php on line 1367

Deprecated: Using ${var} in strings is deprecated, use {$var} instead in /home3/notsoety/public_html/wp-content/plugins/updraftplus/class-updraftplus.php on line 995

Deprecated: Using ${var} in strings is deprecated, use {$var} instead in /home3/notsoety/public_html/wp-content/plugins/updraftplus/class-updraftplus.php on line 995

Deprecated: Using ${var} in strings is deprecated, use {$var} instead in /home3/notsoety/public_html/wp-content/plugins/updraftplus/class-updraftplus.php on line 1568

Deprecated: Using ${var} in strings is deprecated, use {$var} instead in /home3/notsoety/public_html/wp-content/plugins/updraftplus/class-updraftplus.php on line 2307

Deprecated: Using ${var} in strings is deprecated, use {$var} instead in /home3/notsoety/public_html/wp-content/plugins/updraftplus/class-updraftplus.php on line 3170

Deprecated: Using ${var} in strings is deprecated, use {$var} instead in /home3/notsoety/public_html/wp-content/plugins/updraftplus/class-updraftplus.php on line 3176

Deprecated: Using ${var} in strings is deprecated, use {$var} instead in /home3/notsoety/public_html/wp-content/plugins/updraftplus/class-updraftplus.php on line 3311
2020 recipes to try Archives | Not So SuperMom VS Society Advocacy, Small Shop Loving, & Kid-Centric Activities Fri, 17 Apr 2020 12:57:20 +0000 en-US hourly 1 https://wordpress.org/?v=6.1.6 https://notsosupermomvssociety.com/wp-content/uploads/2019/11/cropped-NSSM-32x32.png 2020 recipes to try Archives | Not So SuperMom VS Society 32 32 157416425 Easy Strawberry Tart https://notsosupermomvssociety.com/easy-strawberry-tart/?utm_source=rss&utm_medium=rss&utm_campaign=easy-strawberry-tart Fri, 17 Apr 2020 12:57:10 +0000 https://notsosupermomvssociety.com/?p=2427 Strawberry Season Every year we have a tradition- fruit picking. Sometimes it’s apples, sometimes it’s blueberries & blackberries, but our favorite so far has definitely been strawberries!Honestly fruit picking is pretty rad. I mean you can stop and have a fresh snack break whenever you want, it’s a great bonding and memory making experience, and …

Easy Strawberry Tart Read More »

The post Easy Strawberry Tart appeared first on Not So SuperMom VS Society.

]]>
Strawberry Picking with the boys

Strawberry Season


Every year we have a tradition- fruit picking. Sometimes it’s apples, sometimes it’s blueberries & blackberries, but our favorite so far has definitely been strawberries!
Honestly fruit picking is pretty rad. I mean you can stop and have a fresh snack break whenever you want, it’s a great bonding and memory making experience, and it’s fairly economical.


With Spring being here and Strawberry Season starting, I wanted to share my favorite Spring recipe, Strawberry Tarts. This recipe checks all the important boxes:
  • Easy & Quick Prep
  • Simple
  • Delicious Results
Also, because it’s outdoors and spacious, it’s an amazing trip to do with your family during Quarantine!

Ingredients & Instructions


INGREDIENTS:


  • 1 sheet frozen puff pastry, thawed
  • 1 egg
  • 2 teaspoons water
  • sparkling sugar (optional)
  • 1 pint strawberries, washed/hulled, and sliced into 3-4 slices each
  • 1/4 cup strawberry jam
  • 3/4 cup white sugar, divided
  • 4 ounces mascarpone cheese
  • 4 ounces whipped cream (fresh whipped cream or cool whip)
  • ice cream for garnish (optional)


INSTRUCTIONS:


  1. Preheat oven to 400F
  2. On a parchment lined baking sheet, roll out the puff pastry dough to a large rectangle.
  3. In a small bowl, whisk together the egg and the water.
  4. Use a knife to score a border 3/4 of an inch inside from the edge of the puff pastry. Use a fork to pierce the inside of the tart several times.
  5. Brush the pastry with the egg wash along the border. Sprinkle with sparkling sugar if desired.
  6. Bake for 20 minutes until golden brown and cooked. Set aside to cool.
  7. While the puff pastry is cooking, prepare the topping. In a large bowl, stir together the whipped cream, 1/2 cup white sugar, and mascarpone cheese.
  8. In a separate bowl, mix together the strawberry slices, 1/4 cup white sugar, and strawberry jam.
  9. Once puff pastry is cool, top with the cream and then the strawberries. Keep refrigerated until ready to slice and serve.
  10. Top with vanilla ice cream. Enjoy!


Everett comes back from his Gigi’s house in a week, and I absolutely cannot wait until we can go strawberry picking and make all of our strawberry treats!
Did you try this recipe? Tell us below!

The post Easy Strawberry Tart appeared first on Not So SuperMom VS Society.

]]>
2427
Volcano Egg Dyeing https://notsosupermomvssociety.com/volcano-egg-dyeing/?utm_source=rss&utm_medium=rss&utm_campaign=volcano-egg-dyeing https://notsosupermomvssociety.com/volcano-egg-dyeing/#comments Mon, 06 Apr 2020 22:17:12 +0000 https://notsosupermomvssociety.com/?p=2698 Both boys loved doing Lemon Volcanoes and have been asking to do them every day. With Easter coming up, I decided to give them what they asked for while dyeing their eggs. In years past, we’ve done traditional egg dyeing, whip cream egg dyeing, and natural egg dyeing. The whip cream dyeing was our favorite …

Volcano Egg Dyeing Read More »

The post Volcano Egg Dyeing appeared first on Not So SuperMom VS Society.

]]>

Both boys loved doing Lemon Volcanoes and have been asking to do them every day. With Easter coming up, I decided to give them what they asked for while dyeing their eggs.

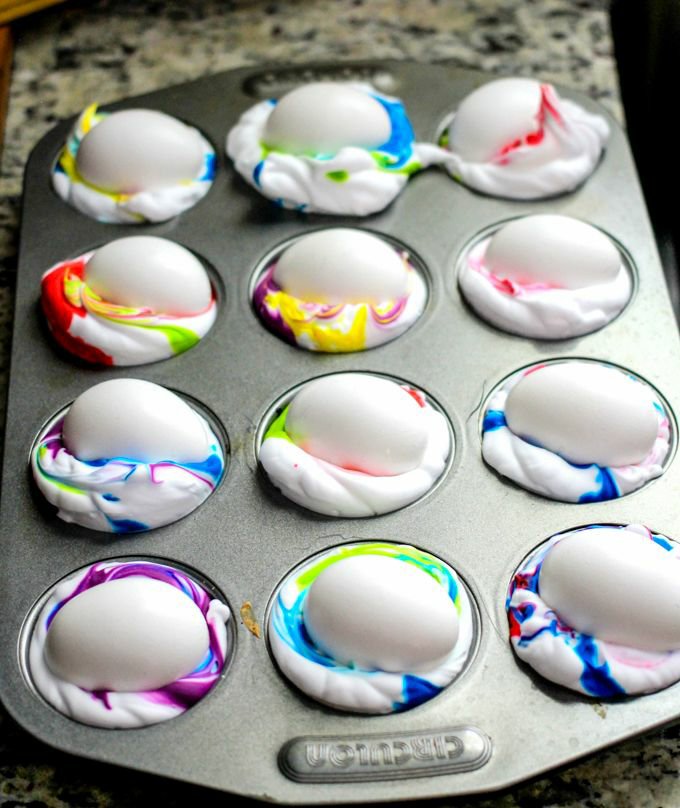
In years past, we’ve done traditional egg dyeing, whip cream egg dyeing, and natural egg dyeing. The whip cream dyeing was our favorite method until volcano dyeing!

Ingredients & Instructions

Instructions:

  1. Create baking soda paint using a tbsp (or so) of baking soda, couple tsps of water, and some food coloring. Mix it up and experiment until you have the consistency you want.
  2. Add food coloring to your baking soda paint or drip it directly on your eggs. I found placing your eggs in a muffin tin during this process made things easier.
  3. Using your paintbrush, carefully paint your eggs with your baking soda paint.
  4. Pour vinegar on top of the egg and watch the “volcanic eruption” all around your egg. You can also carefully drop your egg into a cup of vinegar, but my boys enjoyed using their pipettes to cause the “eruption.”
  5. Repeat steps 1-4 as often as you want! Each egg will be different based on your color combinations. You can even add things like rubber bands to the eggs to help make cool patterns!
  6. Carefully pat eggs dry or simply let them air dry.

For the science behind this activity, check out our Lemon Volcano post!

Did you use this method to dye your eggs? Share your photos on our Facebook Page!

The post Volcano Egg Dyeing appeared first on Not So SuperMom VS Society.

]]>
https://notsosupermomvssociety.com/volcano-egg-dyeing/feed/ 4 2698
Edible Peep Playdough https://notsosupermomvssociety.com/edible-peep-playdough/?utm_source=rss&utm_medium=rss&utm_campaign=edible-peep-playdough https://notsosupermomvssociety.com/edible-peep-playdough/#respond Tue, 31 Mar 2020 13:43:25 +0000 https://notsosupermomvssociety.com/?p=2667 Easter is just around the corner, so this week I’m focusing on fun Easter activities. Today I’ll be focusing on edible peep playdough and slime. The best thing about this activity, is that it covers all the bases: it’s fun, educational, delicious, easy to make, and pretty to look at! Ingredients & Instructions Instructions: Place peeps into …

Edible Peep Playdough Read More »

The post Edible Peep Playdough appeared first on Not So SuperMom VS Society.

]]>
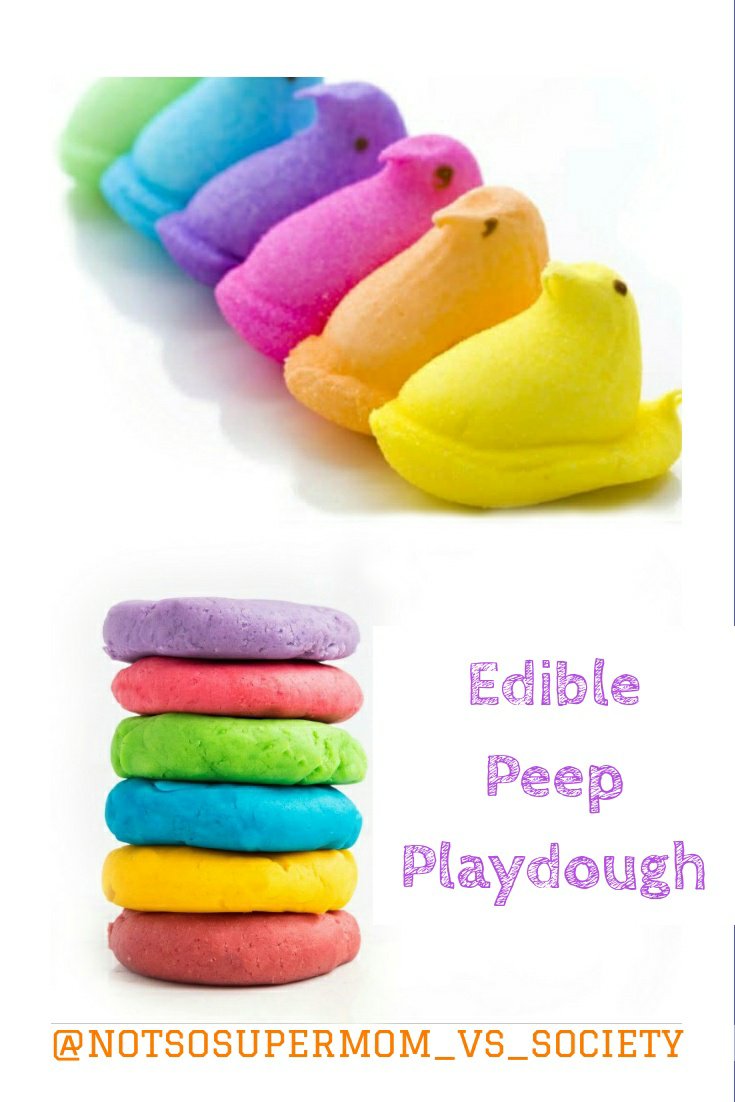
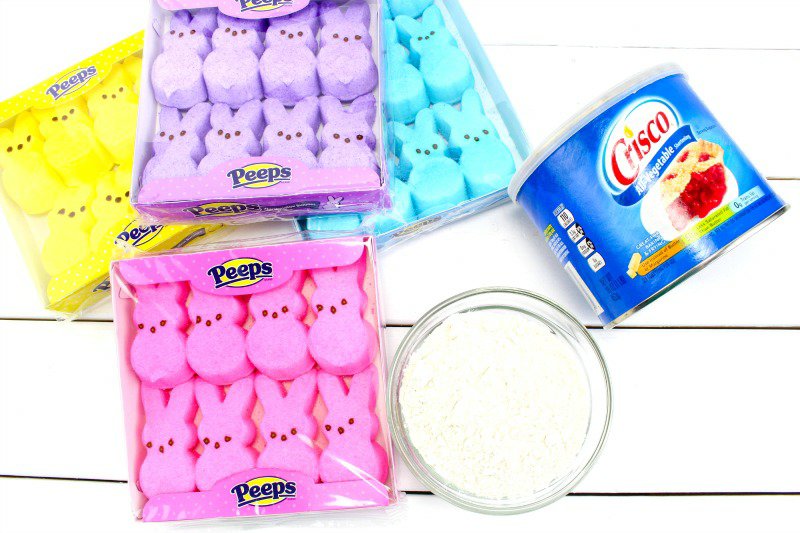
Easter is just around the corner, so this week I’m focusing on fun Easter activities. Today I’ll be focusing on edible peep playdough and slime.

The best thing about this activity, is that it covers all the bases: it’s fun, educational, delicious, easy to make, and pretty to look at!

Ingredients & Instructions

Instructions:

  1. Place peeps into microwave safe bowl and cook for 30-45 seconds.
  2. Remove from microwave and add canola oil and 3/4 cups of corn starch.
  3. Stir until the melted marshmallows can be handled. It’s important to stir until the corn starch is completely mixed in.
  4. Next, dust hands with corn starch and knead until it’s not sticky and easily pliable.
  5. Get creative. Use cookie cutters to make shapes. Challenge your child to make cool structures, letters, or shapes.

Pro-Tips:

  • Almost any oil will work. My two favorites for making this dough are crisco or coconut. Coconut tastes and smells better (in my opinion), but for those who don’t like coconut, crisco makes a great scent free alternative.
  • You can also substitute powdered sugar for cornstarch or make one batch with each and have your children compare/contrast.
  • If you’re child is more interested in making slime, decrease the corn starch. Around 3 tablespoons should give you a great consistency, however, I reccomend measuring out 1 tablespoon at a time until you reach the desired consistency. Make sure each tablespoon is thoroughly mixed in before adding the next.
  • If it’s too sticky, add more cornstarch/powered sugar. If it’s too stiff add more oil.
  • Only store this in a baggie or air tight bowl for around 3 days.
  • Use fresh peeps. Stale peeps don’t provide the same consistency.

Science & Sensory Benefits

Research shows that sensory play builds nerve connections in the brain’s pathways, which lead to the child’s ability to complete more complex learning tasks. Sensory play supports language development, cognitive growth, fine and gross motor skills, problem solving skills, and social interaction.

Playing with playdough in particular helps little hands improve their fine motor skills, helping improve things like writing. It’s also an amazing tactile experience and gives kids a way to feel unique textures.

The STEAM benefits of this activity are also super awesome:

  • Science: How does heating the Peeps change their properties?
    • Peeps are marshmallows, and marshmallows are made of tiny air bubbles surrounded by gelatin and sugar syrup (sugar). When the peeps are microwaved, the water molecules in that syrup begin to vibrate and heat up. This process creates steam, and it fills all of the air pockets in the peeps. As the air pockets fill up the peeps expand!
  • Technology: What tools do you use to change Peeps into play dough?
  • Engineering: What recipe is required to transform Peeps into play dough?
  • Art: Which colors are the peeps? What colors can you make mixing them? What shapes can you make?
  • Math: How much corn starch is needed to turn Peeps into playdough? How long do the marshmallows have to be heated? What happens if you cook them too long or too little?

Did you try this activity? Let us know your thoughts below!

The post Edible Peep Playdough appeared first on Not So SuperMom VS Society.

]]>
https://notsosupermomvssociety.com/edible-peep-playdough/feed/ 0 2667
Delightfully Delicious Date Balls https://notsosupermomvssociety.com/delightfully-delicious-date-balls/?utm_source=rss&utm_medium=rss&utm_campaign=delightfully-delicious-date-balls https://notsosupermomvssociety.com/delightfully-delicious-date-balls/#respond Wed, 11 Dec 2019 19:28:19 +0000 https://notsosupermomvssociety.com/?p=2301 Delightfully Delicious Date Balls

The post Delightfully Delicious Date Balls appeared first on Not So SuperMom VS Society.

]]>
Delightfully Delicious Date Balls

A few years ago, my best friend Ellie jokingly told me I needed to eat her balls. I thought she was just being a bit silly and offhandedly making a dirty joke. Instead, it turned out she had a dirty little secret- she had a recipe for the most delicious, melt in your mouth, and heavenly date balls.

Pirates at Foley Beach
Ellie & I in Charleston, SC

After a bit of cajoling, she gave me her recipe for this amazing treat. The great thing about this recipe, is that you can add your own little twists to it (ie coconut flakes), and it still tastes great.

These date balls also have the added benefit of giving you a boost energy. Dates are high in natural simple sugars and carbohydrates, which are converted into glucose for the cells to use as energy. They also have a low glycemic index, meaning that our bodies will digest them slowly, providing energy throughout the day.

Ingredients:

  • about 10 oz of dates, chopped
  • 1 cup sugar
  • 1 stick butter
  • 1/2 cup nuts of choice (pecans, almonds, walnuts. Ellie prefers walnuts, I’m an almond fan though.)
  • 1 cup rice krispies

Optional:

  • 1 cup powdered sugar or coconut flakes for rolling the balls in
  • Coconut oil

Instructions:

  1. Melt butter and sugar together on medium heat until sugar is completely melted into the butter. The second the sugar dissolves, remove from heat.
  2. Stir in chopped dates. Continue stirring for several minutes until dates have become a nice gooey delicious mass.
  3. Quickly stir in the chopped nuts and then the rice krispies.
  4. Roll into wee balls and roll in confectioners sugar.
    • ***BALLS ARE VERY HOT! Use coconut oil or butter on your hands to help minimize ouchies***
  5. Devour.

Tips:

  • I prefer using fresh dates, though any will do.
  • I recommend using a food processor on the dates. They are super sticky and take forever to chop by hand
  • Hide your balls from small children & partners. Trust me you won’t want to share!

Now to the rest of the recipes to complete your holiday baking list!

Check out these delicious recipes by some of my favorite mommy blogger friends:

Yummy sugar cookies, because it wouldn’t be holiday baking without them.

Chocolate peppermint cookies, these have two of the classic Christmas flavors.

Snickerdoodle Cookies , these are my husband’s favorites and you will love them!

The post Delightfully Delicious Date Balls appeared first on Not So SuperMom VS Society.

]]>

https://notsosupermomvssociety.com/delightfully-delicious-date-balls/feed/ 0 2301
Ultimate Taco Soup https://notsosupermomvssociety.com/ultimate-taco-soup/?utm_source=rss&utm_medium=rss&utm_campaign=ultimate-taco-soup https://notsosupermomvssociety.com/ultimate-taco-soup/#comments Wed, 20 Nov 2019 05:08:37 +0000 https://notsosupermomvssociety.com/?p=2260 Give this delicious Ultimate Taco Soup recipe a try and you won't regret it!

The post Ultimate Taco Soup appeared first on Not So SuperMom VS Society.

]]>
Ultimate Taco Soup Recipe
Delicious taco soup

Cooking is like painting or writing a song. Just as there are only so many notes or colors, there are only so many flavors – it’s how you combine them that sets you apart.

Wolfgang Puck

Ultimate Taco Soup

I think it’s safe to say my Ultimate Taco Soup is one of the best recipes for taco soup I’ve made. It’s an easily modified recipe that everyone will love, picky eaters included! There’s really no way to go wrong with this recipe. This recipe has hints of chilli with added upgrades like avocado, corn, tortilla chips as well as the extra flavor of cilantro and cheese. Yum! If you’re not a fan of spicy soup, or if you’re making soup for the kids, you I leave the chilli out. Or, if you’re a chilli lover, (like my husband), you could even add 2 to 4 chilli peppers- depending on how spicy you would like the soup to be.

Everyone has their own variation of the Ultimate Taco Soup, some people prefer for the soup to be thick like gravy, while others prefer watery and thin. My preference is a thicker, but not very dry, chicken or beef tortilla soup that is broth-based with many vegetables and toppings.

My Ultimate Taco Soup is perfectly spiced, chunky and easy to make. The broth has a deep rich essence that comes from the sautéed garlic, onions and cilantro- which release their flavor before the spices and broth are added. 

The tortilla chips, cheese and avocado that are added as toppings make the soup base thicken- giving it that luxurious and comforting feel. Yummmm…

You are definitely going to love this Ultimate Taco Soup recipe!

Before cooking

Ingredients 

For the soup : 

  • 8 plum tomatoes, if you don’t have plum tomatoes or want to save time, use canned tomatoes (I like to use the diced tomatoes with added garlic or bell peppers)
  • 4 tablespoons of olive oil
  • 4 cups chicken stock or beef stock if you’re using ground beef
  • 1 onion, diced 
  • 3 garlic cloves, minced or 2 tablespoons of garlic powder
  • 1 red bell pepper, diced
  • 1 yellow bell pepper, diced
  • 1 dried ancho chili pepper, optional 
  • 2 teaspoons chili powder
  • 2 teaspoons cumin, ground
  • Salt and black pepper, ground
  • 3 ears of fresh corn or 1 8-ounce package frozen corn (optional)
  • 1 15-ounce can peeled tomatoes
  • 1 15-ounce black beans can or pinto bean can
  • 1 15-ounce red kidney bean can (optional)
  • 3 cooked chicken breasts, shredded chicken or 1lb of ground beef 

For the soup toppings : 

  • 2-3 avocados, freshly sliced
  • Tortilla chips 
  • 1/2 cup fresh cilantro, chopped
  • 1 cup Monterey Jack cheese, shredded
  • Sour cream, optional
  • 2 limes, optional
  • 2 plum tomatoes, optional 

Instructions

Firstly, you would need to begin by roasting the tomatoes. You need to slice the tomatoes in half and add them to a pizza pan or baking sheet, they should be arranged with the skin side facing upward. Before adding the tomatoes to the pizza pan or baking sheet, spread around one tablespoon of olive oil, once you’ve added the tomatoes, drizzle them with another tablespoon of olive oil. I also like to lightly sprinkle them with garlic powder. You should then let the tomatoes roast until they begin to brown slightly and their skins wrinkle- for about 25 to 30 minutes. The oven should be preheated to 350F.

Using two tablespoons of oil, cook your chicken thoroughly or brown your ground beef. Sprinkle with salt and pepper to taste. When the chicken is done, cut it into small bite size pieces and set it to the side.

Now, in a large stock pot, heat the remaining two tablespoons of  olive oil over medium-high heat. Add the bell pepper, 1/4 cup cilantro, garlic and onions. Sauté for 5 minutes. Add the cumin and chilli powder, allowing it to cook for a minute. Begin to stir in the chicken/beef stock and the chilli (if you have chosen to use chilli) and bring to a medium-high heat to boil. You can then cover the pot and decrease the heat, leaving the pot to simmer for 15 minutes. Once done simmering, take out the chilli- remove the stem and cut to remove the seeds, but keep the seeds if you would like the soup spicier. 

In a bowl, combine the canned tomatoes, softened chili and roasted tomatoes, and use a food processor to puree the mixture for about a minute. Add the pureed mixture to the soup and leave the pot to simmer for about an hour. Now, add in the cooked chicken/beef as well as salt and pepper to taste. Finally, add the corn & beans and let the soup simmer for 5 minutes.

To garnish- ladle into bowls and add 3 or 4 slices of avocado, tortilla chips, cilantro (if there’s a cilantro hater, leave this fresh cilantro out), diced tomatoes, and 2 tablespoons of cheese that’s shredded. 

To keep the avocados from browning, squeeze a quarter of a lime over them. You can add the lime quarters on the side to add fresh brightness to the soup, or you can squeeze them yourself prior to serving. I personally love the extra zing.

Finish the soup off with a spoonful of sour cream (not necessary, but it tastes so good!). All that’s left to do now is to serve the soup and enjoy!

Frequently Asked Questions

Can the Ultimate Taco Soup be frozen?

Yes it can, however, before heating be sure to thaw the soup at room temperature to avoid the vegetables turning mushy.

Can I leave the cheese out?

The broth won’t be as rich and thick, but yes, you can. You would just end up having a leaner and lighter soup.

Is there a way to make the Ultimate Taco Soup Low-Carb?

Yes, you just leave out the tortilla chips or substitute it with something else crunchy.

Can I leave the cilantro out?

Yes and no, as with any ingredient, it can be left out- but, it won’t taste the same as it would with the ingredient being included in the recipe. From personal experience, serving the Ultimate Taco Soup to cilantro haters, they enjoyed it. The illusive “soapy” taste gets removed during the process of cooking the soup. If you have cilantro haters in the house, just leave out the fresh cilantro at the end.

The post Ultimate Taco Soup appeared first on Not So SuperMom VS Society.

]]>
https://notsosupermomvssociety.com/ultimate-taco-soup/feed/ 9 2260